Do I Need An Electrician for a House Rewire in Los Angeles?

electrician performing a house rewireHouse rewiring is a tough project. It is disruptive and demanding of funds and electrical experience. The answer to if you need an electrician for a house rewire is yes.

An electrician is the technician that determines whether you need a house rewire. But after this, many homeowners prefer to consider making a house rewire a DIY project. It’s only possible to do this if you have the knowledge and experience with electrical service.

Read on as we discuss the reasons why you need an electrician for a house rewire and other tips like the steps to take to rewire your home with or without an electrical technician.

Why you need an electrician for a house rewire

Statistics show that the average American homeowner has 9 unfinished projects on their to-do list. 55% of these homeowners will attempt to DIY the projects and only 31% of these end successfully.

While DIY culture is booming, it’s important to remember that there are several factors involved in projects like a home rewire. For example, safety precautions, appropriate materials, building codes, permits, and more.

DIY is risky in many ways. It’s risky to your health and life as well as that of others and your property. Electrical work is dangerous business and without the right precautions, experience, or knowledge shocks, electrocution, and even fires can occur.

Most electrical projects like a home rewire usually require permits that ensure safety protocols and codes are being followed. Performing such electrical work without a permit is against the law and comes with legal consequences. Also, if someone in the home should get hurt from such improper work, you could be persecuted.

Hiring a professional electrician for a home rewire guarantees your electrical safety and efficiency. It is also cheaper and compliant in the long run.

Tips for safely rewiring your house

  • Find out if you need to get a permit and do so.
  • Carry out an inventory to know the materials you need for the project.
  • Consider any additions you would like.
  • Create a plan that shows what will be done and when it will be completed, especially when working with an electrician.
  • Avoid damaging the existing infrastructure.
  • Hire an electrician familiar with working on older or existing buildings.

Stages of a house rewire

A house rewiring project usually takes two distinct stages. The first stage involves the circuits, wiring, cabling, and back boxes replacement.

The second stage involves light fittings, faceplates, and sockets installation.

How often should you rewire your home?

Unlike regular repairs and replacements, a house rewire is hardly needed often. There is no specific timeframe for rewiring you home as electrical systems have a life span that depends on factors like use. If your home is over 25 years old or up to, it will benefit from a rewiring project or updating. You should carry out electrical inspections every 10 years if you are a homeowner or every 5 years if you are a landlord to ensure electrical safety and efficiency.

If you think you may need a rewire in Los Angeles, call our office and we can send one out to assist your situation. Your Los Angeles electricians are standing by waiting to help!

Do I Need a Permit to Add a Subpanel in Los Angeles?

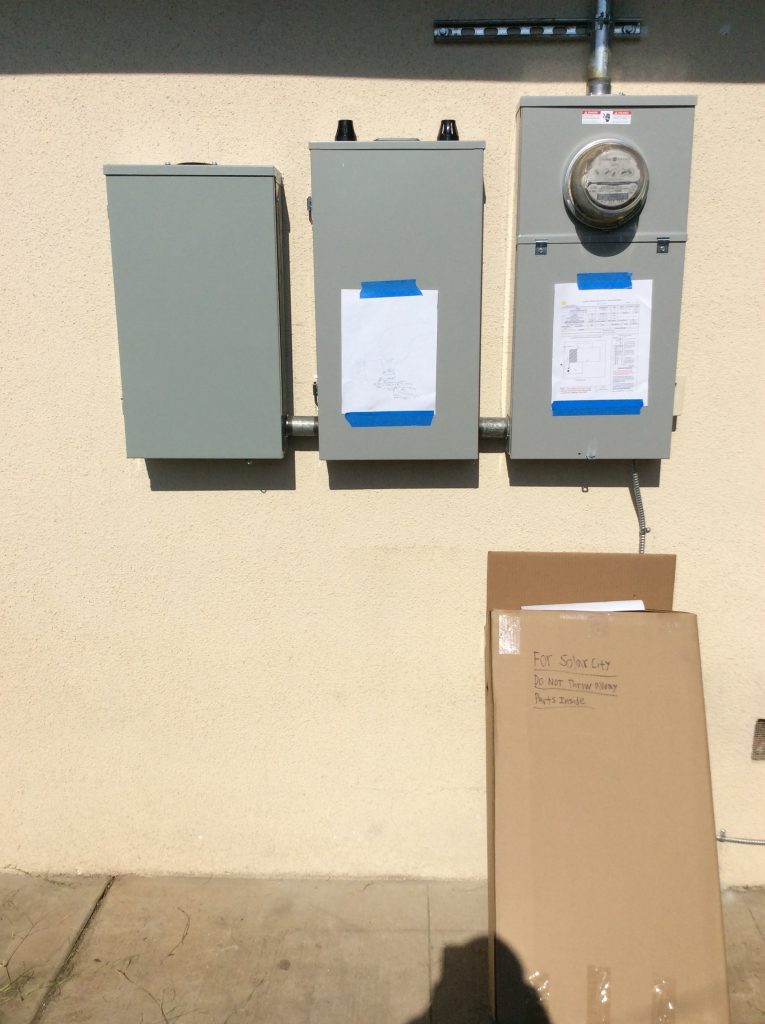
los angeles panel upgradeYour home’s electrical panel provides power to all electrical components of the home. But sometimes the electrical panel may need assistance and this is where a subpanel comes in.

A subpanel can be described as a mini electrical panel. It has the same structure and functions as the main electrical panel and is only present as a sub. A subpanel is connected to the main panel via three thick wires. It has separate bus bars for ground and neutral wires and may be labeled ‘lugs only’. In most cases, the subpanel isn’t the same brand with the main electrical panel.

Why do I need a subpanel?

Choosing to add a subpanel can be for different reasons because subpanels are not mandatory. A subpanel provides ample space when you need to install more appliances in the home, renovate, or simply lessen the load on the main electrical panel. They also provide convenience by reducing circuit wiring runs when you centrally locate the subpanel. This also helps to reduce a drop in voltage.

How does it work?

To add or install a subpanel, you must first determine the right sizing. It involves considering the power you need alongside what the main electrical panel has to offer. For example, you can easily add a subpanel of 100 amps if the main electrical panel is 200 amps or more. Bur when you have a 100 amp main electrical panel adding a subpanel of the same 100 amps in contradictory. The only solution will be to upgrade your main electrical panel first.

The National Electrical Code (NEC) has specific rules when it comes to installing subpanels or main electrical panels. The electrical panels must have a minimum of 36 inches of clearance in front, 30 inches of clearance across the face, and 78 inches minimum above the floor.

In addition, you must mount the panel in a safe, dry, and easily accessible area.

Do I need a permit for this?

Most electrical work requires a permit, but for installing a subpanel the situation differs across jurisdictions. You would have to contact your city’s building and code department, Los Angeles Building and Safety, to determine if you require a permit before starting the installation.

Also, be sure to inquire about inspection schedules to know when you can call for an inspection of the work. Bear in mind that if you require a permit for this electrical work, it should only be acquired by the person who will be performing the work.

Tips for installing a subpanel.

Shut off electrical power to avoid accidents before you begin any electrical work. Determine where you will mount the panel. Seek professional help from a local electrician.

When to Contact a Los Angeles Electrician

If you think you may need to install or replace a subpanel in Los Angeles, give The Electric Connection a call today. Our team of dispatchers are standing by waiting to take you call. They’ll go over your project with you and get you on schedule with one of our expert electricians. Don’t delay!

How To Pull An Electrical Permit In Los Angeles

pulling permit in los angelesAn electrical permit is exactly what it sounds like. It is obtaining permission from the appropriate authorities to perform electrical work. An electrical permit is required for a lot of electrical works and it is the first step towards an electrical service that conforms to safety codes and standards.
When do I need an electrical permit?

You would require a permit for the following electrical tasks:

  • Installation or alteration of low-voltage systems like computer systems, security alarms, or stereos.
  • Installation or alteration of any permanent wiring or electrical device.
  • Running additional wiring, installing an outlet or fixture, converting fuse boxes to circuit breakers or installing a receptacle for a garage door opener.

Hence, electrical permits are necessary for most electrical installations, replacement, or repairs.

Who pulls or buys the permit?

Pulling an electrical permit falls on whoever is performing the electrical work. You cannot use a permit gotten by someone else or obtain a permit for someone else. If the person you hire asks you to purchase the permit for the work they will do, this is wrong and against the law and such permit is invalid. Licensed electricians and building owners are often the parties involved in pulling a permit.

If you are a homeowner who will do the work themselves, you will require a permit through a process slightly different from that acquired by a licensed electrician.

How to get a permit for electrical work?

Building Codes Division (BCD) field offices or the local building department in your location are the authorities who issue permits. To pull an electrical permit in Los Angeles, you will look to the Los Angeles Department of Building and Safety (LADBS). The LADBS enforces the Los Angeles building code, making sure all buildings are safe when issuing permits for building, repairs, renovation, and even demolition.

To get a permit for residential electrical work, you do not need drawn plans. There is an exception if the service involves up to 400 amps or more. Office staff or an electrical inspector can help determine that you have all the required information for the project. If your request is in order, you can usually leave with your permit. The permit fees are paid when the permit is issued.

According to LADBS, permits involving simple projects can be issued online or in a few minutes at the office; small to medium projects require a counter plan check and can be reviewed from one hour to within the same day; larger projects will be reviewed in weeks after a walk-in submission of the request.

A visit to the LADBS website provides direction on how to obtain the appropriate project permit either online or on a visit to the office.

How about inspection?

Inspections are vital and must be requested before the electrical work or no later than 3 business days after completion. There are penalties for failing to request an inspection. When requesting an inspection, you will have to provide details such as the permit number, homeowner’s name, type of inspection needed, date for the inspection, and project address.

Hiring a Los Angeles Electrician to Pull Permits

The Electric Connection has been in business for over 40 years providing expert electrical services to the Los Angeles area. Our in office staff and electricians work with inspectors every day. We know how to pull permits in Los Angeles and can help out if you need assistance. Give us a call today to start your next electrical project!

Relocating a 220 Volt Outlet in Los Angeles

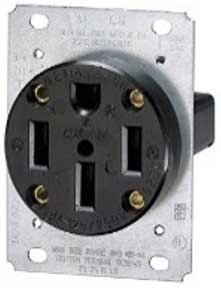
220 volt outletA 220-volt outlet is the most powerful outlet in the home. It is built for power-demanding appliances, like ovens, dryers, and more. You can identify 220-volt outlets as outlets that are larger and different-looking than others. They usually have either 3 prong or 4 prong holes.
If you are renovating, remodeling, or moving any of these power-demanding appliances, you would have to move or install new 220-volt outlets to serve them.

Relocating or installing a new 220-volt outlet is always ideal because it sets the outlet behind the appliance, giving the room a clean look. It also helps to eliminate dangerous situations from using electrical extension cords.

Use the following steps to relocate your 220-volt outlet.

  • Safety first.
    Before you get started with the relocation, shut off the power to the area of appliances. Next, take out the outlet cover and remove the outlet from the box. You can use an electrical tester to confirm that there is no power in the outlet. If possible, let others in the home know you will be working with electricity and the power has to remain off till you are done. Try to use rubber-handed tools and even a high-voltage glove to be sure of safety.
  • Choose and prep your new location
    Choose the new location of the appliance and mark out the spot for the outlet on the wall in that spot. Cut open the drywall using the same dimensions as the existing outlet.
  • Remove the wires
    Run the wires from the existing location to the new one. Ensure you use a stud finder to identify the stud where the outlet will be mounted.
  • Mount the outlet
    Cut a new wire and run it from the old location to the new one. Then cut two inches of sheathing from the ends of the wire. Pull off half-inch of insulation from the black, red, and white leads on both ends. Nail the gang box for the outlet to the stud. Connect the wires that go into the old outlet’s gang box. Cover each with a wire nut and electrical tape. Run the opposite end of the new wire into the gang box, leaving up to 8 inches of wire coming in. Connect the black and red wires to the positive terminals and white wire to the negative terminals. Attach the mud rings to the gang box and slide the outlet in. Make the connection to the mud ring, place the new cover on the outlet, and screw in.
  • You can use drywall patches to patch the old outlet location.

    Before using the outlet you can reach out to an electrician to inspect the installation for safety reasons. You can also contact us for further inquiries.

    Call a Local Electrician

    Relocating a 220 volt outlet requires the help of a local Los Angeles electrician. The Electric Connection is just one phone call away. Give us a call any time Monday through Friday from 8am to 5pm PST and one of our dispatchers will be happy to talk with you. They’ll get you on schedule with a professional electrician who can help complete your project in no time at all!

Rewiring a Los Angeles House Room by Room

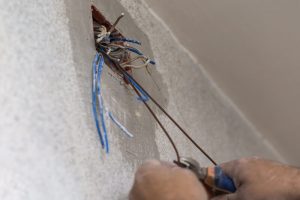
los angeles house rewire by electricianDeciding to rewire your home does not come easily, and there’s no surprise why. Aside from the fact that home rewiring projects dig deep into your pockets, there’s the disruptive nature of the project to consider. But despite what seems like two distinct disadvantages, here are the many benefits that outweigh them and support your decision for home rewiring.

  • New wiring, new electrical power experience
  • A dependable electrical system
  • No more flickering lights, burning smells, or shortage of power
  • More room to add new appliances and remodel
  • Save on energy bills
  • Improved electrical safety
  • Reduce the chance of a power cut
  • Ensure electrical wiring lifespan
  • Prevent damage to your home appliances
  • Increase home resale value

While a home rewire is an option for many reasons, not just any homeowner should rewire their home. There are conditions under which a home rewire is needed and they include:

  • If your home is old, and the wiring is outdated
  • You have hazardous aluminum wiring
  • You are renovating
  • Your electrical system is unsafe with several faults, flickering lights, and so on.
  • Your electrical wiring has insufficient capacity

When you are experiencing any issues with your electrical system, it’s advisable to call on a professional Los Angeles electrician to inspect your wiring and point out the issue. The electrician will advise on if a home rewire is needed.

How to rewire room by room

  1. Make a list – Make a list of the appliances you have now and those you would like to add in a few years. It’s best to think as far as 25 years. This is because most rewiring projects are done every 2 decades. You can consider installations like:
    • Lighting and ceiling fans
    • HVAC
    • Kitchen appliances
    • Water heater
    • Devices such as wheelchair lifts and stairlifts
    • Home office electronics
    • Hot tub, spa, sauna or swimming pool
    • Entertainment systems
  2. Get an electrical building permit – The person who will perform the rewire project has to pull a permit before the work can start. If a rewiring project is carried out without the necessary permit, you might have to take it all down later.
  3. Get to work rewiring room by room – Shut off the electrical power to the home, disconnect circuits, and disconnect wires from electrical boxes. Draw a plan of your new circuitry. Cut holes in the drywall to install new outlets and switches. Run the new wires through the backs of the electrical boxes and staple lateral runs of wire with wire staples. Run the wiring for the new devices and connect each new circuit.

Attempting a rewiring project yourself is no joke, and it gets worse if you have no electrical experience or knowledge. It is always better to leave such demanding electrical services to professional electricians. Hiring a professional saves money in the long run, guarantees electrical safety, and is stress-free for the homeowner.

Be sure to test all your electrical components after the project and ascertain they are working fine. If you opted for DIY, ensure a professional electrician inspects the wiring room by room afterwards.

Contact A Local Los Angeles Electrician

The Electric Connection is proud to employee some of Los Angeles’ greatest electricians. If you need help with a house rewire in Los Angeles or the surrounding areas, be sure to give us a call. We have even created an online form where you can get a free house rewire quote delivered to your inbox in minutes. Don’t take a house rewire project on yourself, give us a call and we can help!

Can I use an extension cord to run power outside?

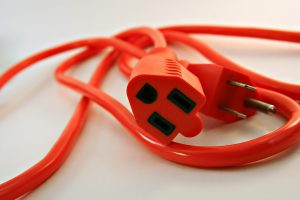
extension cord legalGetting power within the home is easy. You are already set up with outlets, cables, and extension cords. So, all you have to do when you need to put on the TV, use the microwave, or other appliance is plug in and switch on. However, when you need power outside, it’s different. Running power outside depends on a few factors starting from what you need power for, or rather the duration of use.
Power Outside for Short Term Use

Yes, you can use an extension cord to run power outside if you only need power for a short time. This can include quick activities like trimming the bushes or illuminating a party in your backyard. An extension cord built for outdoor use has you covered from hours to up to two days outside. It’s important you note the use of the term outdoor extension because not all extensions are built for the conditions outside your home. An indoor extension should not be used even for only a few hours outside. Purchase an extension cord identified as an outdoor extension cord.

Also, note that even outdoor extension cords built for use outside should not exceed more than a day or two in use. This is to prevent vital parts of the cord from breaking down and leading to electrical fire or shocks.

Other things to consider when using extension cords for outdoor use

  • After ensuring you use an outdoor extension cord, verify the wattage before purchasing it. The cord should be able to accommodate the wattage needs it will be connected to.
  • Next is the length of the cord. Electricians would often advise on using long extension cords outside the home. However, there’s some discretion to be applied to how long or how short the cord should be. A short cord might not meet your needs and a lengthy cord can easily become a cause for accidents, tripping, and falling. Choose the right length according to your needs and be sure to clip a longer cord or its excess to the ground or tuck it neatly away from sight and foot traffic.
  • Also, ensure that the cord is plugged to a GFCI outlet outdoors. A GFCI outlet grounds the current and protects against shock if the cord is exposed to water.

Power Outside for Long Term Use

When you need power outdoors for more a day or two, an extension cord won’t cut it. Perhaps you need to light up the lawn regularly or something else. In this case, you would need a professional electrician to install outdoor electrical cables and GFCI outlets. This is not a DIY task. The electrician will dig trenches 18-30 inches deep depending on the specifications of electrical code. The cable will be encased in solvent-welded PVC conduit and connected from both ends to GFCI outlets. It requires expertise, tools, and experience. Afterwards, you will have a safe and dependable outdoor source of power.

Contact us at the Electrical Connection for further inquiries or installation of an outdoor power source.

How many amps is a Tesla charger?

Electric cars are clearly the latest and most sought after development in the automotive industry and Tesla is leading the pack. So, when you have just purchased your very own green car, you can leap for joy about avoiding fueling costs and several other issues that come with it.

However, you still have to figure out charging your Tesla.

The amperage of your Tesla charger can play a vital role in determining how much total charge or miles of driving you get. Here’s the breakdown of amps per charger level.

You might be familiar with using a level one charger, which is the common 120V outlet in your home. This works with the portable EVSE (UMC) that comes with the car and gives an amperage of 15-20 amps. As far as miles go, you will replenish 3-4 miles per hour. While the charge time may be slow, this works fine for many Tesla drivers.

The level 2 charge is a 240V outlet installed by a professional electrician as a dedicated home EVSE. It has the capacity to power tough power-hungry machines like your dryer. This charge is more powerful than the previous option and delivers on up to 80 amps. This translates to anywhere between 9-52 miles of Tesla range per hour charging.

Level 3 charge, which is hardly an option for homes and private buildings, is an ultra-fast, ultra high-power 480V circuit. They are superchargers often found at charging stations and account for why it’s sometimes faster to use a public charging station than a home charger. It delivers on up to 300 amps, which is up to 170 miles per hour of Tesla charging.

When you look at the spread, you find that you do have a few suitable options. What you choose depends on your driving habits and miles. To install a level 2 charge be sure to contact a professional electrician or Tesla charger installer.

COVID-19 Update from The Electric Connection

Coronavirus Statement

All of Our Electricians Have Been Vaccinated Against COVID-19

los angeles coronavirus covidAs a valued customer or potential of The Electric Connection, we wanted to post and let you know that we are paying close attention to all updates from the CDC and local officials concerning COVID-19 (“Coronavirus”). Our highest priorities continue to include the welfare and safety of you, our customers, as well as our employees.
As electrical contractors, we have been classified by government agencies as a service business that should remain available to meet the needs of the public, so until circumstances change we will continue to remain open for business. However, we are doing our part to minimize potential risks related to any concerns with regard to Coronavirus.

We have addressed with our electricians the critical importance of safe practices and sanitation and have supplied our crews with face masks, gloves, hand sanitizer, and other disinfectants. We have instructed all employees to stay home if exhibiting symptoms of the flu or cold, and have told them not to enter homes or businesses where customers are symptomatic of this virus. Additionally, we have instructed our employees to greet customers verbally but to avoid handshaking and to physically keep a reasonable distance from others while on any job site. We thank you in advance for your understanding in these matters.

Our office employees continue to be reachable by phone and email during our normal office hours of 8 am – 5 pm Monday through Friday by setting up a phone and computer communication system that allows our office personnel to work from home. Thank you for choosing The Electric Connection for your past and ongoing electrical needs and we welcome any questions or concerns you may have.

Los Angeles COVID-19 Resources:
Coronavirus (COVID-19) Information from CDC
Coronavirus Disease 2019 (COVID-19) Symptoms & Testing from CDC
California Coronavirus (COVID-19) Response

Is cloth-covered wiring a safety concern?

cloth covered wiring safetyIf you are planning to purchase an old home or you are already living in one, then chances are you may have seen cloth-covered wiring in the home.
Electricity was discovered in the 1800s, and it was not until the 1900s it became common in homes and buildings. As you might imagine, technology hadn’t gotten so far either, so cloth-covered wiring seemed like a good solution at the time. It wasn’t until the 1960s that plastic covered cables were introduced.

So, is cloth-covered wiring a safety concern? Short answer, YES.

Cloth-covered wiring served as standard insulation during those early times and kept homes running on electricity for several years. However, in recent times, the drawbacks and dangers of cloth-covered wiring have become more obvious and dangerous. Cloth-covered wiring is also quite outdated and out of standard.

Some risks posed by cloth-covered wiring include its vulnerability to being chewed by rats and insects and getting worn or torn over time. Either of these will cause the wire underneath to be exposed creating a major fire hazard.

Cloth-covered wiring is also associated with what is known as knob and tube wiring. During the time that cloth-covered wiring was popularly used, knob and tube wiring was the standard method for running these wires through homes. The knobs and tubes in question were made of ceramic and used to run the wires through the walls. These installations are prone to breakdown, do not supply enough power, and do not carry the safety features of modern wiring methods like grounding.

In addition, some cloth-covered wiring was further insulated with asbestos paper. When wear and tear or brittleness occurs, the asbestos may breakdown releasing its hazardous particles in the air. Asbestos is a known carcinogen to humans and extremely dangerous. All of these contribute to why cloth-covered wiring is a safety concern.

What you can do

The good news is you don’t have to take your purchase elsewhere or abandon your home for safety reasons. Cloth-covered wiring can easily be replaced by professional electricians. A whole-house rewiring will eliminate the presence and dangers of cloth covered wiring.

What is required?

A professional electrician is a first and most important factor in a whole-house rewiring project. The electrician will inform you of what is needed including the cost. Whole house rewiring can be a bit demanding financially but it’s well worth it for the electrical safety of your home, family, and appliances. You will get an all-round improved electrical system with the current electrical standards, grounding, new electrical panel, three-prong outlets, and GFCI outlet protection against shocks and much more.

Contact us today, for more details and excellent service.

How do you pull a new wire through a wall?

Wiring a home under construction or during a remodeling project is easy, mostly because the walls are accessible. The real difficulty comes when you are trying to pull a new wire through a wall – an already existing wall.

Ideally, this is something you can do with some electrical knowledge and a step-by-step procedure. Here’s how electrical technicians get it done.

Tools you need

  • Stud finder
  • Drywall saw
  • Electricians fish tape
  • Wire stripper
  • Electrician’s tape
  • Auger bit or drill
  • Cable

Wiring Steps

  • Before diving into any electrical work, it is crucial to shut off power to that area completely. Go to your electrical panel and turn off the power. To ensure you have proper lighting without electrical power, carry out this project during the day.
  • Ensure there is a clear path to thread the wire through by using the stud finder to check for studs, pipes, or obstacles in the wall. Plan your route with this.
  • Next check the attic, basement, or crawlspace to confirm you have a clear path for threading the wire.
  • On the main floor, identify where the wire will exit. Draw the outline of a box and ensure it is in line with others you have before. For example, if you are fishing the new wire through an outlet, check that your outline is on the same level as others. This is usually 12-18 inches above the floor. Use a drywall saw to cut out the hole following the outline. After cutting the hole, use a drill or auger bit to drill through the wall plate. Repeat similar procedure with the drill in the attic or basement where you would like the wire to enter through.
  • Tape the fish tape tightly to the cable and make sure you have excesses or enough wire and fish tape to grip. Slide the wire through the opening. It is easier to fish a new wire through a wall if you have someone on the other side to help you pull on the wire if anything happens. Fish the wire gently by pulling at short intervals on one end while your helper feeds more wire from the other end.

If you run into any roadblocks, you will have to repeat the earlier process of drilling another hole in the wall to fish the cable’s free end.

To make it easier to pull the wire you can employ a method that professional electrician’s use. Coat the cable with a lube product. This lubrication makes the cable slippery and easier to pull while protecting the sheathing from tearing.

If the procedure is just too difficult or time-consuming for you, the best option is always to call a professional electrician.