How to Pull an Electrical Permit in Los Angeles

pulling permit in los angelesNot all projects require a permit, but most electrical works do. In Los Angeles, it’s easy to pull an electrical permit if you meet all the requirements. Since pulling permits differ from state to state, we have put together the Los Angeles guide you need.

An electrical permit is an approval you get from your building department to go ahead with electrical projects in a home.

In Los Angeles, you will need electrical permits for any kind of electrical works. These include work related to;

  • All residential and commercial buildings
  • Installing a new electrical panel
  • Installing a new sub panel
  • New buildings or addition to a building
  • Any electrical installations over 600 volts.
  • Installations of lighting including exits lighting and security lighting.
  • Installations in hazardous locations.
  • New, expanded, or replaced electrical items
  • Installation of a complicated electrical system as determined by the Department, such as Emergency, Legally Required Standby, Fire Alarm, and Gas Detection Systems.

The Permit Process

To pull an electrical permit in Los Angeles, you must first file electrical plans with the indicated department. These plans and the first step are referred to as electrical plan check. Only when this plan check has been approved or deemed not required will a permit be issued.

Electrical permits in Los Angeles can also only be issued to an electrical contractor with the appropriate license, the property owner, and or an agent representing either the contractor or the property owner.

Why it’s important to pull a permit when necessary?

Pulling a permit in Los Angeles may seem like a hassle to you, but it’s necessary if you want to avoid certain unfriendly situations. Electrical work carried out without a permit is considered illegal. Such unpermitted work can cause even more problems in the future if the option of a resale comes up. There’s also no assurance that the work was done up to code.

Where can I obtain the permit in Los Angeles and how much time is involved?

You can obtain an electrical permit from the local Building and Safety District Office serving your area. For online permits, you can go through Los Angeles County’s Electronic Permitting and Inspection (EPIC LA).

For simple projects that do not require a plan check, you can get an express permit when you apply online.

For small-medium projects, a plan check can take 45-60 minutes and as the projects get larger, plan checks extend to even weeks.

After obtaining the permit, the permit expires within 12 months if work has not started from the time it was issued.

It’s possible to get an extension on your permit, but that might require an extra fee.

How to make obtaining an electrical permit in LA easy

Start by hiring a professional and licensed electrician for your electrical needs. It’s legal, easier, and safer to let this experienced technician pull the permit for your project. All you will need to do is likely to bear the cost.

Licensed electricians can get permits faster and pass inspections easily too. They are also updated on current codes, and this saves you any future problems.

How Do Electricians Rewire a House?

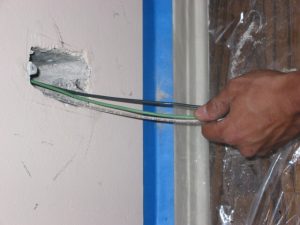
electrician pulling wires through wallRewiring your home can be a tough or easy process depending on how you approach it. However, it’s an electrical project that must be done once it’s necessary. It’s good to wonder what’s involved and how electricians rewire a house. Read on as we explore this.

What’s involved in rewiring a house?

The first thing to know is that rewiring can be messy and disruptive despite how much your professional electrician tries to keep this smooth and easy. The walls will have to be drilled into, and the flooring lifted in some cases. Your electrician will;

  • Install new cables
  • Rewire sockets
  • Add or move outlets, switches, light fixtures, and so on.
  • Fit new back boxes on outlets and switches
  • Add wiring for a smart home if needed.

Also, home rewiring projects usually occur in two stages, which are;

  • Replacing circuits and back boxes, cabling, and wiring for the first stage.
  • The second stage involves installing lighting fittings, faceplates, switches, testing, and setting everything up for use.

How is a home rewired?

  • Step 1 – Get the required permits and codes

A rewiring project will need a permit from your local building department. The electrician will pull the permit while you cover the expenses.

  • Step 2 – Access the walls.

Depending on the condition of your home (lived in or vacant) the electrician will have to determine how he plans to access the walls of your home. After making this plan, he will figure out any new cable locations too. Most of the new wiring will have to be run through the attic and crawlspace before entering the walls. With a plan in motion, the electrician will shut off power to your home to begin.

  • Step 3 – Drill new holes and rewire outlets

It might become necessary to drill new holes to rewire outlets, switches, or install fresh wiring for future appliances. A professional electrician with skill can do this easily and protect your walls from excessive damage.

  • Step 4 – Determine the number of circuits

Chances are you are rewiring your home because it’s an old home. Most old homes lack enough circuits to meet the demands of modern homes. A professional electrician is updated and knowledgeable of the recent National Electrical Codes and can identify the appropriate number of circuits following these guidelines.

  • Step 5 – Replace your service equipment

Rewiring your home can mean changing the wiring in addition to replacing your service panel. It’s up to your licensed electrical technician to find out if your electrical panel needs to be repaired or replaced to suit the new wiring.

When is rewiring necessary?

Rewiring offers many benefits such as more power, efficiency, and safety in your home. But it can only be done when necessary. You can call an electrician to see if you need to rewire your home in any of the following situations;

  • You live in an old home
  • You are planning on a major renovation
  • You are adding new major appliances
  • Your electric system is unsafe

How to Hang a Chandelier

Chandeliers are the most elegant lighting fixtures with the ability to switch up the appearance of any room. One chandelier hanging from your ceiling in the right spot can create that sophisticated look you’ve always wanted.

Unfortunately, when it comes to hanging a chandelier, many homeowners think it’s a long and confusing process. This holds you back from purchasing that exotic chandelier and you couldn’t be more wrong.

Hanging a chandelier can be easy and quick with the right information. You can DIY this or ensure your convenience and safety by calling a professional electrician near you.

Start by choosing the appropriate size, and design for the spot you want to hang the chandelier. Next, get the right tools which include;

  • Screwdriver
  • Wire stripper
  • Ladder
  • Plier
  • Tape measure
  • Electrical wire tester

Here are the steps to install a chandelier.

You would either be installing your chandelier with a chain or hook, as these are the most common.

First, turn off the electric power to the room you will work in. This can be done with the switch at the circuit breaker. Also, turn off the light switch in the room itself. These steps are to ensure safety as you install the chandelier.

Next, unpack the chandelier and read all the manufacturer’s instructions. Reading the manufacturer’s instructions helps to serve as an additional and accurate guide on what to do as you install. You can identify details like chain length from the manufacture’s instruction.

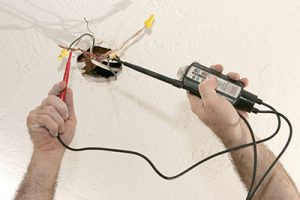
Prepare the ceiling electrical box. Unscrew the canopy and examine the wires that will power your new chandelier. You should see three separate wires (black, white, and copper wires). Check for damaged wiring and use a voltage meter to check for a hot wire. If all is fine with your junction box, move on to the next step. If not, you will have to fix any damage first and probably call an electrician at this point.

Now, install the mounting bracket over the junction box in the ceiling. At this point, you need to go back to the manufacturer’s instructions to assemble your chandelier.

If you are hanging a chandelier chain, measure the appropriate length and thread your wire through the chandelier chain. Make sure you give room for excess wire when threading.

Open the electrical box in the ceiling and attach the threaded wire from the chandelier to the corresponding wires in the ceiling. In most cases, you will have a black and copper wire from the chandelier. Use a wire stripper to strip off half an inch of insulation from the chandelier wires. Attach the ends of the black chandelier wire to the ends of the black wire in the junction box. Do the same for the second wire.

Tuck the wires back into the junction box and cover it up.

Install your chandelier bulbs and switch the electricity back on to enjoy your working chandelier.

If you would rather avoid the hassle, call an electrician here today for easy and fast chandelier installation.

What’s that Electrical Buzzing Sound in the Wall?

hummingYour house is not the scene of a horror movie. So, in most cases when you have heard a certain buzzing sound more than once, it’s probably real and not your mind playing tricks.

What’s normal about electrical buzzing sounds?

Electrical appliances do make sounds caused by the electricity itself. This is thanks to the alternating current in electric wires which cause fluctuations or irregularity in magnetic fields. The fluctuations, in turn, produce vibrations which play out as harmless, quiet sounds.

The twist to this, however, is that not everyone can hear the sounds of their electrical appliances. Only very few people who are attuned to the sound of electricity can. For audible sounds to be created, there has to be an increase in voltage.

When is an electrical buzzing sound no longer normal?

When the noise, hum, or buzz becomes louder than it should be, then it’s time to worry. An electrician can help you point out the source of the buzz and its cause.

An electrical buzzing sound can also be referred to as a mains hum. You can often hear a mains hum which is above 60 hertz around your refrigerator or other large units in the home that operate on a motor.

Beyond this, a mains hum can indicate a problem in your breakers or wiring. If the loud sound seems to come from a breaker, shutting it off may be a bad idea. Hence, contacting an electrical technician is the best thing to do.

If the noise comes from an appliance or fixture, you can shut it off immediately before calling a professional electrician. An electrical buzzing sound from a lighting fixture might only require you to change the bulb to fix the problem.

Buzzing sounds from the wall usually indicate old or damaged wires. You can shut off the power to the circuits in that area to stop the noise and call an electrician.

Wall outlets can be another source of an electrical buzz and the culprit is often improperly grounded wiring or increase in voltage that overwhelms the wiring.

It’s important to attend to electrical humming sounds as soon as possible. If the humming sounds do indicate a problem, then there is a risk of electrical fires and the issue getting worse than it is. Getting professional help on-time serves to protect life and property. Do not attempt to DIY the issue as it can only make things worse and put everyone around you in danger.

How Do You Get A License To Be a Los Angeles Electrician?

los angeles electricianBecoming an electrician is a wonderful career choice. It involves repairing, installing, replacement, and maintaining electrical components in businesses, homes, and buildings in general.

According to a BLS report, “the median annual wage for electricians was $55,190 in May 2018.” The BLS May 2018 data also includes that the annual wage of an electrician in California was $69,320.

You can get a license to be a Los Angeles electrician in any of the 5 licenses that fall under the electrical category for California.  Most of what is needed to acquire the license are similar, and we have outlined the differences below. The 5 licenses include;

  1. General Journeyman Electrician

A journeyman electrician is someone who works under an electrical contractor. The job description includes installing, maintaining, or constructing electrical systems under the National Electrical Code. To apply for a general journeyman electrician license (and any license on this list), you will need proof of,

“successful completion of an apprenticeship program approved by the California Apprenticeship Council, the federal Bureau of Apprenticeship Training, or a state apprenticeship council authorized by the federal Bureau of Apprenticeship Training to approve apprenticeship programs, in the classification for which certification is sought”

This experience itself comprises at least 8000 hours of working under an electrical contractor. The application costs a fee of about $175 and is non-refundable. This license is provided by the Division of Labor Standards Enforcement (DLSE).

  1. Residential Journeyman Electrician

A residential electrician provides electrical services to residential buildings such as homes, hotels, and motels. This license is also issued by the DLSE. You will require proof of experience as stated in the quote above for a general journeyman license. The experience itself comprises 4800 hours of work under an electrical contractor. The fee for the application is also a non-refundable $175.

  1. Voice, Data, Video Technician (VDV)

A VDV technician is one that requires at least 4000 hours of work experience under an electrical contractor in installing, constructing, or maintaining electrical systems that “falls within the scope of the National Electrical Code, Articles 725, 770, (non-composite cables only), 800 (non-hybrid cables only), 810 and 820”.

The conditions for the proof of experience are the same as stated for the general journeyman electrician and so is the application fee of $175. The license is issued by the DLSE.

  1. Fire/Life Safety Technician

The job description is exactly what the name sounds like. A fire/life safety technician’s experience is quite similar to that of a VDV technician. It requires 4000 hours of working under an electrical contractor on systems that are “covered in the National Electrical Code (Article 760) and the National Fire Alarm Code”. The license is issued by the DLSE and fee for the application is $175 with no refunds.

  1. Non-Residential Lighting Technician

As a non-residential lighting technician, your job is to repair, service, and maintain all existing and non-residential lighting fixtures including the installation of retrofit upgrade fixtures. Your proof of experience provided should include at least 2000 hours of work experience under an electrical contractor. The license is issued by the DLSE and fee for the application is a non-refundable $175.

What is an Electrical Contractor License?

hiring electriciansElectrical contracting is a wide and successful industry. It has a value of over $130 billion annually. There are over 70, 000 electrical contracting companies and over 650, 000 electricians in the United States. They serve both residential and commercial electrical needs.
An electrical contractor license is a license that allows the licensee to hire other licensed electricians, bid for electrical projects, and apply for relevant permits for jobs. Almost every state requires an individual electrician or company to obtain this license before they can provide electrical services.

Obtaining this contracting license varies between states. However, the individual electrician must be a master electrician. If it is a firm or company applying for the license, then they must present a master electrician who will be responsible for the contracting activities of the firm.

Requirements to Become an Individual or Business Electrical Contractor

  • Complete electrical apprenticeship to become a journeyman electrician
  • Meet all your State’s requirement to be a certified journeyman
  • Earn a master electrician license
  • Apply for the electrical contractor license and fulfill the requirements

Eligibility for an electrical contractor license

For an individual to be eligible for this license you must meet the following criteria;

  • You must pay the required fees- this refers to the application fee and license fee which may vary across States
  • Have insurance with a reputable insurer
  • Commit to an educational and safety training
  • Complete the necessary forms
  • Possess the qualifications, training, and experience of a qualified electrician
  • You must agree to comply with all the State guidelines, legislative requirements, and the codes of practice

The projects a licensed electrical contractor can handle

  • COMMERCIAL AND INDUSTRIAL PROJECTS
    A licensed electrical contractor can take on huge or small tasks within a commercial and industrial setting. These include working on schools, hospitals, office building, factories, and much more. Electrical contractors can bid competitively for these tasks and can also be hired as permanent members of the design-build team. The services they will provide to these buildings include the design and installation of panels, electrical systems, wiring, electrical equipment, and more.
  • RESIDENTIAL PROJECTS
    Residential projects are the most lucrative business for electrical contractors because homes have evolved to need more customized electrical services. There are integrated communication systems, security and entertainment systems in modern homes. An electrical contractor can perform electrical upgrades, installations, wiring, renovation projects, and more in residential settings. Some projects may require permits which the license enables the contractor to obtain.
  • SERVICE AND MAINTENANCE JOBS
    An electrical contractor can provide this to both residential and commercial settings. The contractors would need to service, maintain, and repair electrical systems. Sometimes such tasks are complete within a day or hours and have a flat rate cost.

The Electric Connection is a licensed electrical contracting company. We hire only the best electrical technicians to work for you. We are professional about our tasks and guarantee a satisfying service each time. You can call on us to handle any electrical tasks you might have. Our electricians ensure they get it right the first time, to save you cost, stress, and time.

What Does Overlamping Mean?

overlampingOverlamping is one of those words you might find strange as a homeowner. But it’s really just a term for describing a common electrical occurrence. Overlamping means fitting a lower-wattage fixture with a light bulb that has a much higher-wattage.
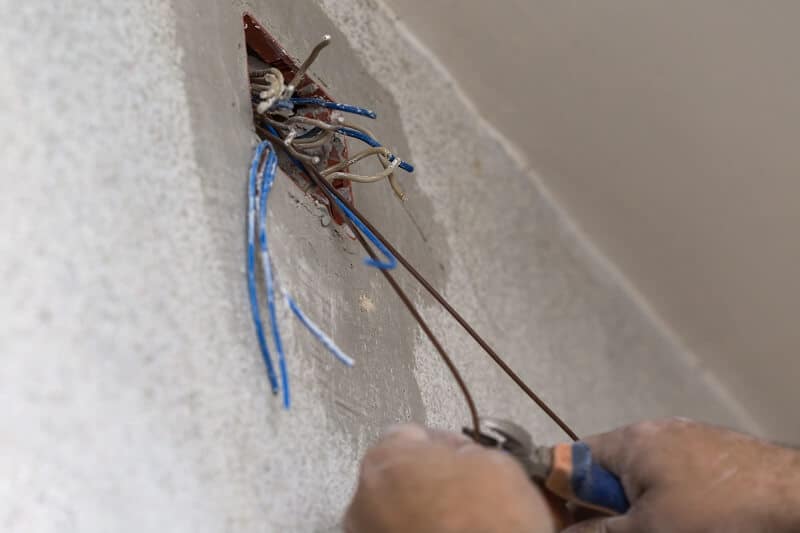
An example of overlamping is placing a 100-watt light bulb on a 60-watt fixture. The implication of this is that the wires connected to the fixture can melt and lead to an electrical fire.

The danger of overlamping

When it comes to electricity there are several do’s and don’ts that help to secure your electrical safety. Overlamping is one of those things you shouldn’t do. When the wiring and socket insulation overheats and melts, it increases the probability of electrical arcs. Electrical arcs are sparks that jump in the air from one wire to another. The electrical arcs, in turn, cause electrical discharge which finally leads to house fires. If you stop the fire from happening or pull out the bulb, the damage will still be done, and the entire setup will need a replacement.

How to find the recommended wattage

The recommended wattage on every light fixture shows the amount of power the fixture is designed to take. Modern fixtures often disclose this wattage. Some use NMB or NM indicated on the jacket of the wire. The letter B, in NMB, tells you that the cable is rated to handle the maximum temperature of 194 degrees Fahrenheit. While NM shows that the maximum temperature the cable is rated for is 140 degrees Fahrenheit. In simpler terms, NMB rated fixtures can accommodate higher wattage bulbs.

Older fixtures hardly indicate the recommended wattage. In this situation, it’s better to stick with the average 60-watt bulbs or even lower.

How can you fix overlamping

When overlamping occurs and you stop the implications of a fire early enough, shut off the power to that fixture or area of the home and call an electrician. Our electrical technicians at The Electric Connection will arrive on time and provide a quality replacement service.

Rewiring a Los Angeles House Room by Room

los angeles house rewire by electricianDeciding to rewire your home does not come easily, and there’s no surprise why. Aside from the fact that home rewiring projects dig deep into your pockets, there’s the disruptive nature of the project to consider. But despite what seems like two distinct disadvantages, here are the many benefits that outweigh them and support your decision for home rewiring.

  • New wiring, new electrical power experience
  • A dependable electrical system
  • No more flickering lights, burning smells, or shortage of power
  • More room to add new appliances and remodel
  • Save on energy bills
  • Improved electrical safety
  • Reduce the chance of a power cut
  • Ensure electrical wiring lifespan
  • Prevent damage to your home appliances
  • Increase home resale value

While a home rewire is an option for many reasons, not just any homeowner should rewire their home. There are conditions under which a home rewire is needed and they include:

  • If your home is old, and the wiring is outdated
  • You have hazardous aluminum wiring
  • You are renovating
  • Your electrical system is unsafe with several faults, flickering lights, and so on.
  • Your electrical wiring has insufficient capacity

When you are experiencing any issues with your electrical system, it’s advisable to call on a professional Los Angeles electrician to inspect your wiring and point out the issue. The electrician will advise on if a home rewire is needed.

How to rewire room by room

  1. Make a list – Make a list of the appliances you have now and those you would like to add in a few years. It’s best to think as far as 25 years. This is because most rewiring projects are done every 2 decades. You can consider installations like:
    • Lighting and ceiling fans
    • HVAC
    • Kitchen appliances
    • Water heater
    • Devices such as wheelchair lifts and stairlifts
    • Home office electronics
    • Hot tub, spa, sauna or swimming pool
    • Entertainment systems
  2. Get an electrical building permit – The person who will perform the rewire project has to pull a permit before the work can start. If a rewiring project is carried out without the necessary permit, you might have to take it all down later.
  3. Get to work rewiring room by room – Shut off the electrical power to the home, disconnect circuits, and disconnect wires from electrical boxes. Draw a plan of your new circuitry. Cut holes in the drywall to install new outlets and switches. Run the new wires through the backs of the electrical boxes and staple lateral runs of wire with wire staples. Run the wiring for the new devices and connect each new circuit.

Attempting a rewiring project yourself is no joke, and it gets worse if you have no electrical experience or knowledge. It is always better to leave such demanding electrical services to professional electricians. Hiring a professional saves money in the long run, guarantees electrical safety, and is stress-free for the homeowner.

Be sure to test all your electrical components after the project and ascertain they are working fine. If you opted for DIY, ensure a professional electrician inspects the wiring room by room afterwards.

Contact A Local Los Angeles Electrician

The Electric Connection is proud to employee some of Los Angeles’ greatest electricians. If you need help with a house rewire in Los Angeles or the surrounding areas, be sure to give us a call. We have even created an online form where you can get a free house rewire quote delivered to your inbox in minutes. Don’t take a house rewire project on yourself, give us a call and we can help!

How do you pull a new wire through a wall?

Wiring a home under construction or during a remodeling project is easy, mostly because the walls are accessible. The real difficulty comes when you are trying to pull a new wire through a wall – an already existing wall.

Ideally, this is something you can do with some electrical knowledge and a step-by-step procedure. Here’s how electrical technicians get it done.

Tools you need

  • Stud finder
  • Drywall saw
  • Electricians fish tape
  • Wire stripper
  • Electrician’s tape
  • Auger bit or drill
  • Cable

Wiring Steps

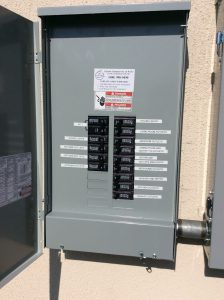
  • Before diving into any electrical work, it is crucial to shut off power to that area completely. Go to your electrical panel and turn off the power. To ensure you have proper lighting without electrical power, carry out this project during the day.
  • Ensure there is a clear path to thread the wire through by using the stud finder to check for studs, pipes, or obstacles in the wall. Plan your route with this.
  • Next check the attic, basement, or crawlspace to confirm you have a clear path for threading the wire.
  • On the main floor, identify where the wire will exit. Draw the outline of a box and ensure it is in line with others you have before. For example, if you are fishing the new wire through an outlet, check that your outline is on the same level as others. This is usually 12-18 inches above the floor. Use a drywall saw to cut out the hole following the outline. After cutting the hole, use a drill or auger bit to drill through the wall plate. Repeat similar procedure with the drill in the attic or basement where you would like the wire to enter through.
  • Tape the fish tape tightly to the cable and make sure you have excesses or enough wire and fish tape to grip. Slide the wire through the opening. It is easier to fish a new wire through a wall if you have someone on the other side to help you pull on the wire if anything happens. Fish the wire gently by pulling at short intervals on one end while your helper feeds more wire from the other end.

If you run into any roadblocks, you will have to repeat the earlier process of drilling another hole in the wall to fish the cable’s free end.

To make it easier to pull the wire you can employ a method that professional electrician’s use. Coat the cable with a lube product. This lubrication makes the cable slippery and easier to pull while protecting the sheathing from tearing.

If the procedure is just too difficult or time-consuming for you, the best option is always to call a professional electrician.

Avoiding Electrical Overload In Your Home

electrical overload los angelesWhat is an electrical overload?

When too much current passes through your electrical wires, you may experience an electrical overload. When this happens, the wires may heat up and melt which may result in a fire starting.

Appliances like televisions, microwaves, hairdryers are the highest power-consuming devices in the average home. The power consumption can go higher once you start thinking of lighting and other smaller devices. A high number of devices will lead to many electrical circuits on your electrical panel.

You run the risk of having an electrical overload once you begin to draw too much power from an electrical source or circuit. While different buildings have different designs, circuit breakers or fuses are often employed to prevent electrical overload. A fuse will burn itself out to perform its job and will need a replacement once it has done so. With circuit breakers, they only trip off if a lot of electrical current is drawn.

Steps to Take to Avoid Electrical Overload

There are a few steps that you can take yourself to avoid the occurrence of an overload.

  1. Know what circuit powers what device. Identifying what circuit your highest power consuming devices are is the first step. A single circuit is usually dedicated to most of these devices. Such devices include furnaces, toasters, hairdryers, refrigerators, and microwaves. Once you have identified these circuits, it is necessary to pay particular attention to them and avoid connecting other devices to them.
  2. Avoid having too many connections to one circuit. Having a lot of devices drawing power from a circuit can cause an electrical overload. In most situations, you do not know how dangerous it is until the fuse burns out or the breaker trips off.

    To find out what device is connected to a particular circuit, you could turn off one breaker after the other while turning on each device. This will help you determine where each connection goes on your board.

  3. Note how much power a circuit can supply. You should only connect the appropriately rated device to an equally rated circuit. With a rated voltage of 120 volts, a 15-amp circuit can only supply power of 1800 watts, anything more is an overload of the circuit. Put this in mind when connecting devices to a circuit. It is recommended that you do not load up a circuit to its maximum rating, this will allow for the connection of other irregularly used devices.
  4. Add more receptacles. At the Electric Connection, we find that most people do not consider getting new receptacles until the old ones burn out. This is wrong. You should get more or better receptacles once you realize that the present ones cannot supply all the electrical power you need. Getting a new outlet will offer you more options in terms of circuit connections and will help reduce downtime in case there is a damaged outlet.

If you are adding new receptacles, you will likely need the help of an electrician. All electrical safety procedures should be implemented before this is done. Contact The Electric Connection for the installation and to ensure you have enough space inside your panel to handle the load. If a panel upgrade is necessary, we will be able to assist as well!

What Uses the Most Electricity in Your Home?

Home appliances are necessary for comfort and efficiency. They literally make life easier for everyone. The only problem is that they all demand electricity to run and some use up much more power than others. Hence, while you enjoy the convenience of warm water or cool air regularly, your electric bills keep rising higher.

A typical home uses energy in the following way:

  • Air conditioning and heating – 46%
  • Water heating- 14%
  • Lighting – 9%
  • Appliances – 13%
  • TV and other media – 4%

Of course, these numbers might shock you. If you are searching for the best way to cut down on your energy bills, you must start by knowing what uses the most electricity in your home. These big eaters will have to be controlled to help you save significantly. Read on to learn about them.

Air conditioning
The air conditioner is one of the most demanding electrical appliances in the home. On its own, this appliance takes up to 19% of electrical power. It is frequently used during summer months to keep the heat at bay and enjoy cool air.

Saving on the air conditioner can be tough but also easy with the right practices. Start by getting an upgrade to a smart thermostat. The thermostat will make cooling schedules work better to save energy. Wear light clothing in the house and sometimes use cost-efficient methods of cooling. These include opening up a window and using fans.

Water heater
The water heater is used more often than the air conditioner, especially on cold days. We rely on water heaters daily for various needs such as showers, washing dishes, and clothes.

You can save on energy by reducing the temperature of your water heater. Change the presetting to 20 degrees and combine this with other saving tips such as low-flow showerheads and faucet aerators. Take shorter showers and use cold water for washing sometimes. Maintain your unit with a professional electrician to improve its efficiency.

Lighting
Saving on lighting is quite simple and should be almost unnecessary if you have taken the right precautions earlier. Throw out the old-school incandescent bulbs and replace them with LED lights. LED lights last much longer and use far less electricity.

Refrigerator
A typical home refrigerator runs for 24 hours on every day of the week. It only goes off when the power does too. But like any other appliance on this list, the refrigerator consumes as much power as it gives. If you don’t have a refrigerator yet, the good news is you can just buy the new and energy-efficient models. If not, you can employ a few strategies to cut down.

Proper maintenance is important to help your appliances work better and use less power. Clean the vents and coils of this appliance regularly and replace any broken parts like the rubber gaskets. Don’t keep the door open for too long and set the refrigerator’s temperature lower.

All saving tips must be practiced consistently to see results.